
Cranking up the educational value on this one so please bear with me, because this lesson involves more tutorial images and less memes. We’ll get back to the goofy eyesore memes after this one, promise!
Before accomplishing any task, you need the right tools for the job. Though debaters seem to have their stuff together and readily dish out arguments, everything behind the scenes involves particular formatting commonly used among the debate community and organizing evidence clearly. Key to bringing your argumentation and logical presentation to the next level, formatting evidence in the debate-specific way will be explained here (these are cards, or card cutting: more on that later).
If you already have Verbatim installed and are ready to cut cards, know how to format evidence in debate, and have mastered researching sources, feel free to skip this lesson. Otherwise, this page will cover exactly those important technical topics, so don’t miss out!
Installing Verbatim for Debate
This section will go over briefly on how to install Verbatim on Microsoft Word to help cut cards, a free-to-download debate software that is used commonly among national-level and advanced debaters. Skip to the “Cutting a Card” section on this page to preview how it is used.
Firstly, make sure that you have the Microsoft Word app and that its version is from 2013 or later. If you don’t, you could ask your school if they have purchased it. Otherwise, an alternative is Google Docs (in which you can search for tutorials online or through YouTube), but most debaters use Word for its ability to easily download and send, common usage, and the ability to save and view documents offline. There are tons of detailed Verbatim tutorials for Word out there on YouTube, so check them out if you would like additional help!
Note that the following images are mostly from 2022.
Head to the Paperless Debate website here (paperlessdebate.com/verbatim) or by Googling e.g. “verbatim debate.”
The page probably looks something like this:
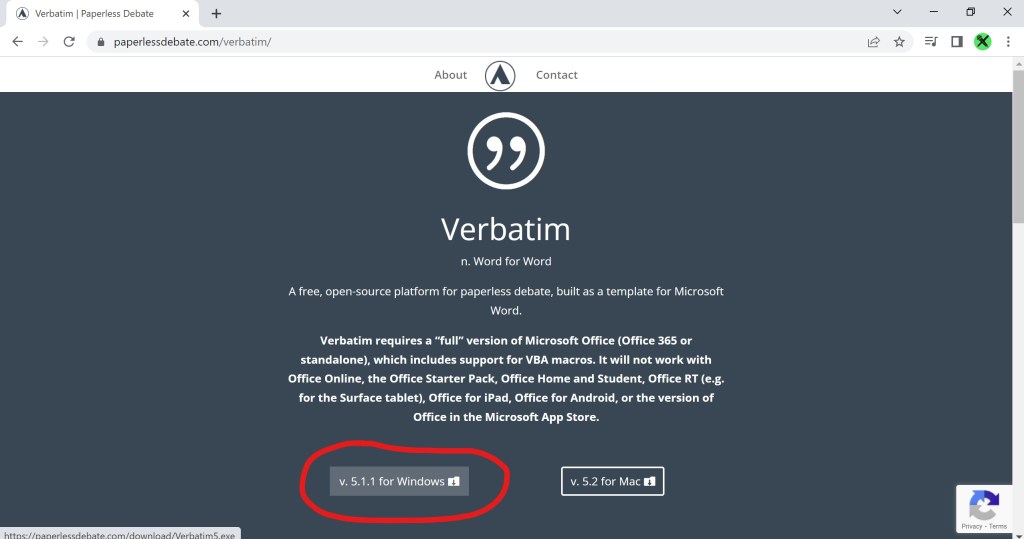
Then, click “download” for Windows (circled in red above). After it downloads, you can open it up.

Make sure you only install one Verbatim, or it may not work, so delete extras that have “(1)” or “(2)” after the name in your downloaded files.
Click on “Verbatim5.exe” to open it, or press “ctrl + j” to see downloads. The following message may pop up.
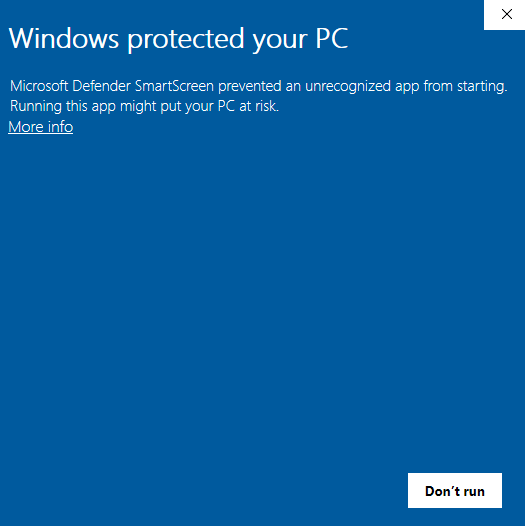
Click “more info,” which will open up a hidden menu that opens another option at the bottom to “run anyways.” If at any point your computer thinks it is a virus (which it is not – it’s been used by thousands of debaters with no issue) or is blocked, make sure your VPN settings allow it to be downloaded (I had to disable my VPN temporarily). Check out the Verbatim manual (docs.paperlessdebate.com/verbatim/getting-started/installation) to troubleshoot if needed.
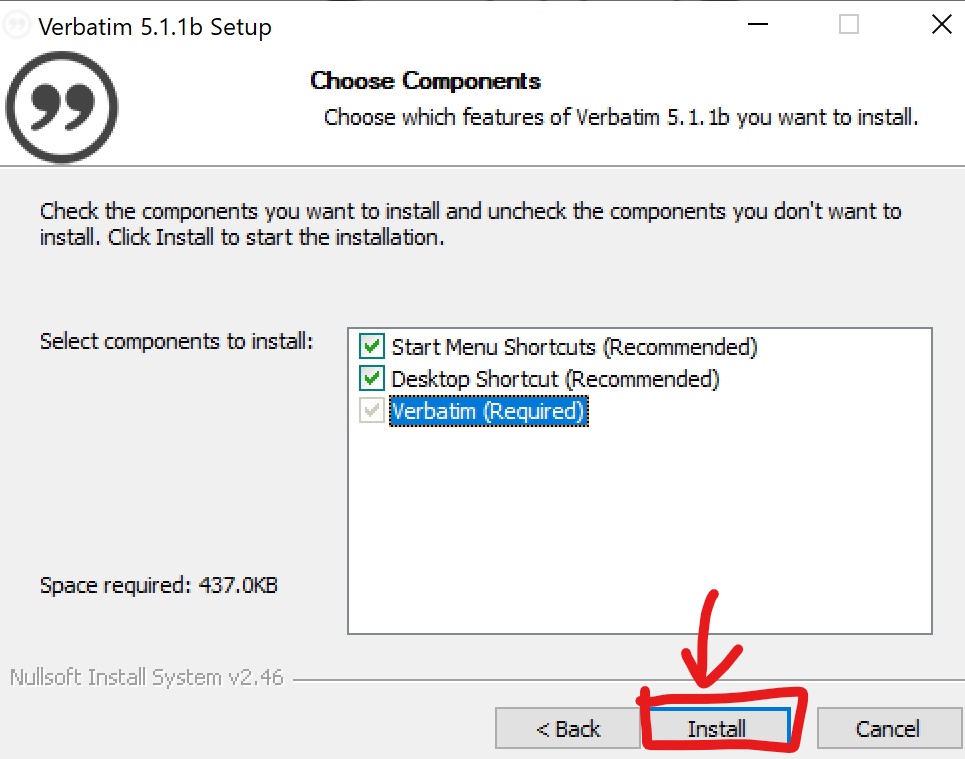
Next, click “install.”
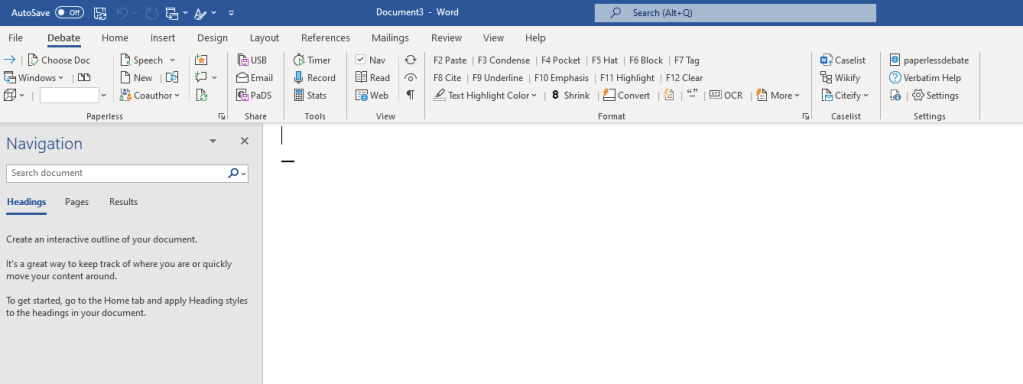
Boom! You have Verbatim downloaded and are ready to start your debate preparation! You can also pin Verbatim to Word desktop app for easy access. Every time you make a blank document through regular Microsoft Word, it doesn’t have Verbatim features installed. Thus, you need to click and open Verbatim app whenever you plan on creating a new debate document.

That’s a questionable desktop background…
Useful Verbatim Functions
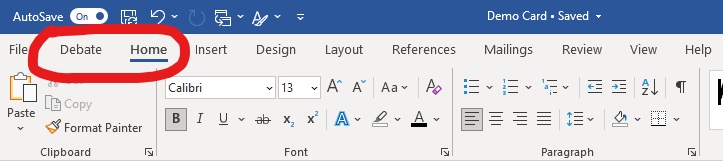
Firstly, as soon as you open Verbatim and decide to start working on a brand-new doc, please make sure that auto-save is on (at the top left corner), in order to save your work as you add things. Over time, it becomes a habit from the get-go, leading to hours of hard work being worthwhile and saved!
This document will now update and save every time you add something to it!
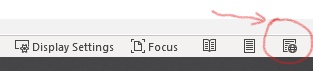
Next, check the bottom right of the doc for page layouts / zoom in. Select the right-most one, or “Web Layout,” as it is the best layout in terms of ease of scrolling and seamless page breaks.
(unselected)
(major glow-up, dark shade means it’s selected!)
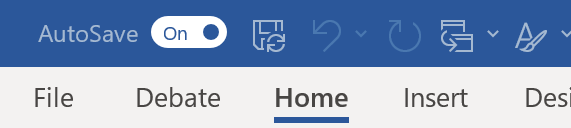
Now, you’re ready to discover important Verbatim functions! At the top few tabs, the two labeled “Debate” and “Home” are the main places you will go in order to format your text.
The “Home” Tab and Navigation Pane
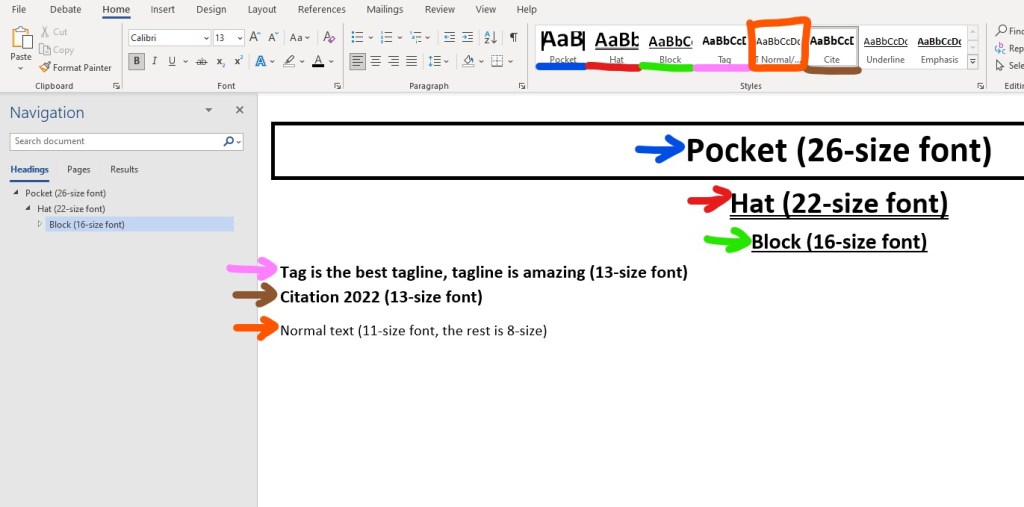
Starting on the “Home” tab, it is basically the same as the “Home” tab on a regular Word doc, except for a few headers being different (shown below).
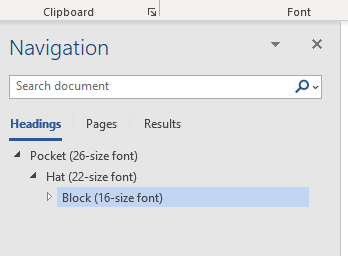
As your documents start getting super long, the Navigation Pane is your friend (seen on the leftmost part of your document).
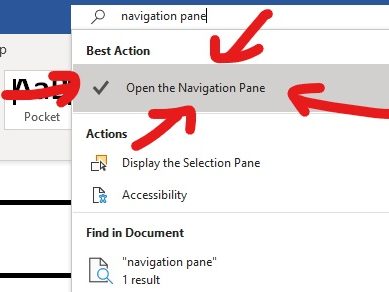
If it isn’t already open, go to search bar at the top of the doc and type in “Open the Navigation Pane.”
“Debate” Tab
As for the brand new tool you now possess, the “Debate” tab contains many features that are uniquely applicable to debate (as indicated from its name). It may seem daunting at first with all of its weird little buttons, but the main ones you likely will be using are outlined in red below.

Pocket (F4), Hat (F5), Block (F6), Tag (F7), and Cite (F8) are shown with their keyboard shortcuts. Each of these are also accessible through the “Home” tab.
Meanwhile, Paste (F2) and Underline (F9) have the same functions as your regular keyboard shortcuts (“ctrl + v” and “ctrl + u,” respectively), except that F2 and F9 only work in Verbatim. Emphasis (F10) is basically bolding and underlining text at the same time. Clear (F12) removes all formatting and Condense (F3) puts multiple paragraphs of text into one single paragraph (great for making your evidence look neater).
Moving on to Shrink (ctrl + 8) with the bolded ‘8’ next to it, you can press ‘8’ on your keyboard while holding ‘ctrl’. This will shrink text that isn’t underlined, one paragraph at a time.
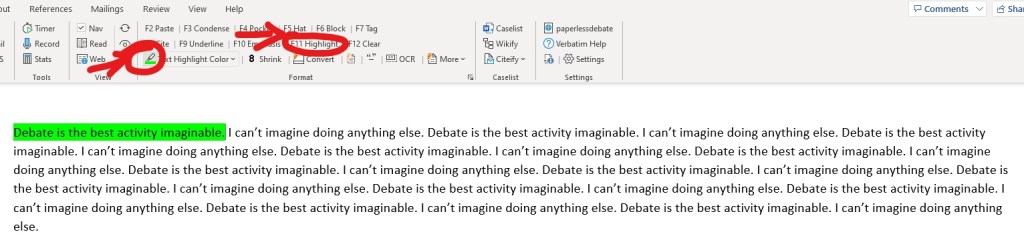
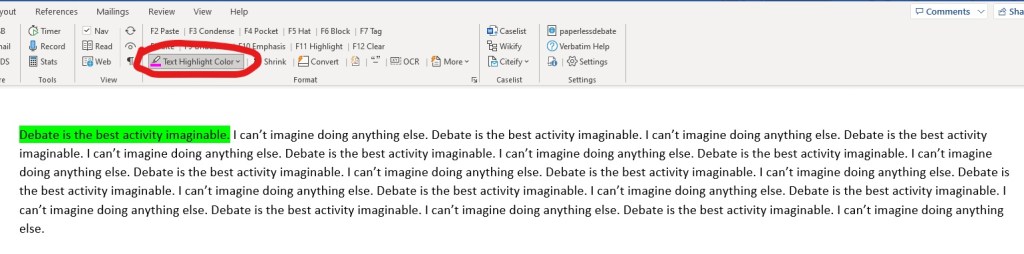
Highlight (F11) and “Text Highlight Color” do the same thing as each other (it’s in their names): they highlight! This function will be very important when selectively highlighting parts of your evidence that you will read in-round. These are shown below:
The difference between the two highlighters is that “Text Highlight Color” is like a real highlighter: click the little color icon, select text, then release, and it’ll highlight what you selected (which can speed things up)!


Press escape (Esc) on your keyboard to deselect the highlighter.
New! Verbatim’s Built-In Tutorial!
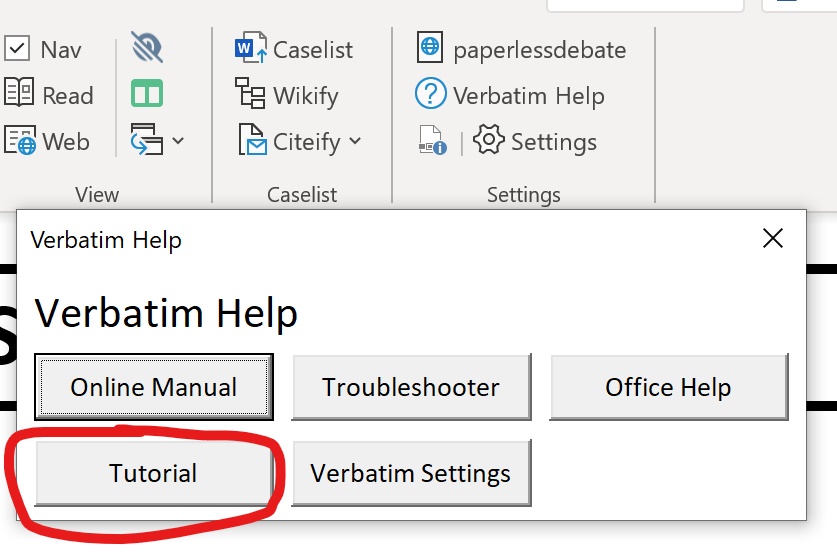
For more information and an interactive tutorial on more functions to improve your efficiency using Verbatim, navigate to the “Debate” tab and click on “Verbatim Help.” A menu selection with an option for “Tutorial” will pop up, which will bring you to a demonstration of many functions like creating speech docs and document sharing!

Useful Keyboard Shortcuts
Here’s a quick list of keyboard shortcuts I found most useful when researching, helping to save time and make you seem cool like a truly sweaty debater.
General
- Underline: ctrl + u
- Bold: ctrl + b
- Italicize: ctrl + i
- Copy: ctrl + c
- Cut: ctrl + x
- Paste: ctrl + v
- Undo: ctrl + z
- Redo: ctrl + y
- Select all: ctrl + a
Verbatim-Specific
- Shrink: ctrl + 8
- Condense: F3
- Deselect Highlighter: Esc

Ryan Beckford, the Hackerman
Cutting a Card
Introduction and Context
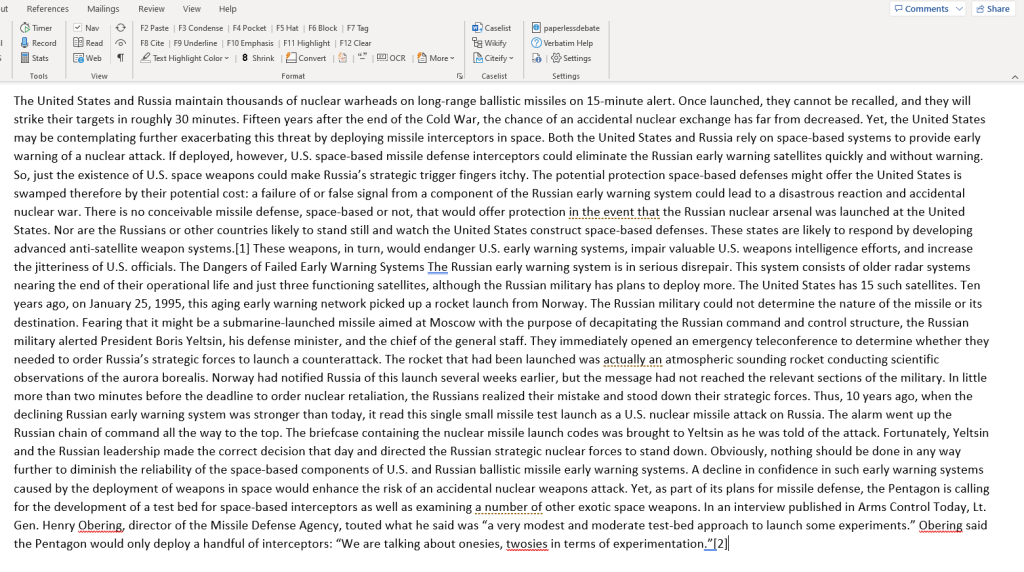
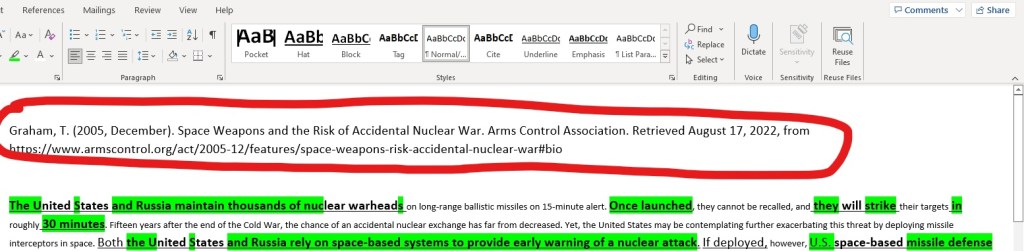
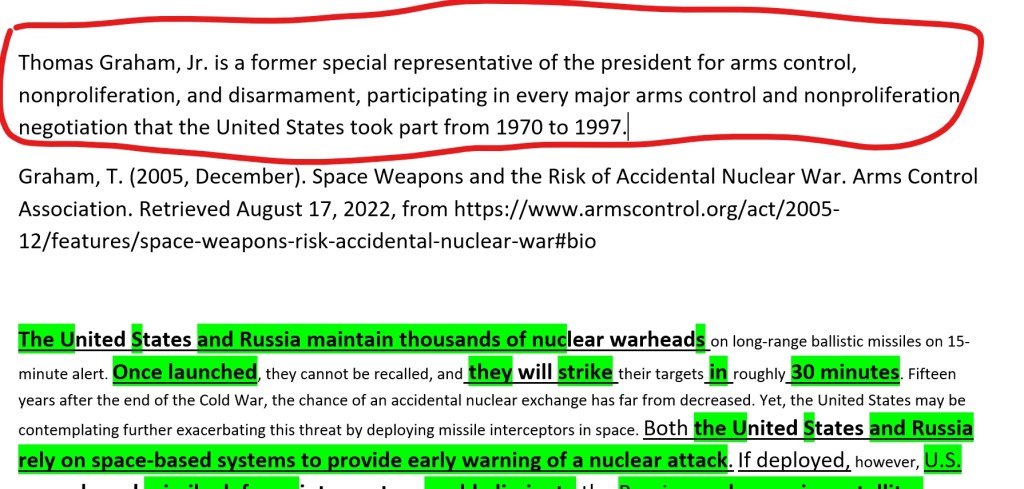
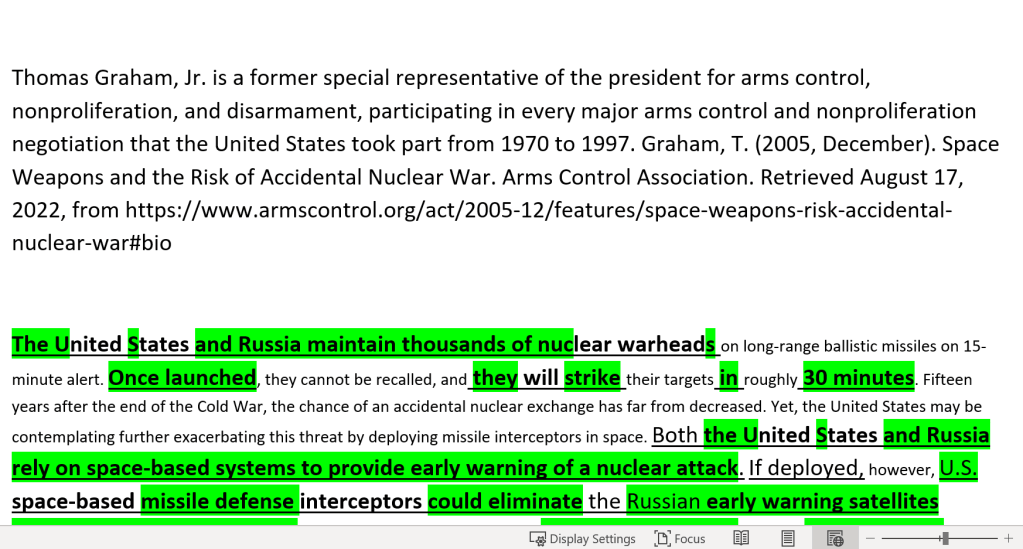
Now to the real meat and potatoes of case-building: cutting a card! This is the way that Lincoln-Douglas debaters format their evidence. As an introduction, “cutting” is the act of copying a paragraph from an article or book (then underlining, bolding, and finally highlighting what you want to read), and “card” is the result you have after you paste the section into Verbatim (and citing it correctly). The reason why it’s called “card-cutting” is that, even though today we get our evidence online, the terminology from back in the day had stuck. Debaters used to literally use scissors to cut out pieces of text from magazines, use a physical highlighter, and compile them together to create a thick case filled with files, storing them in big plastic bins. Today, we don’t have to do all of that tedious work thanks to technology and Verbatim! Behold, a card:
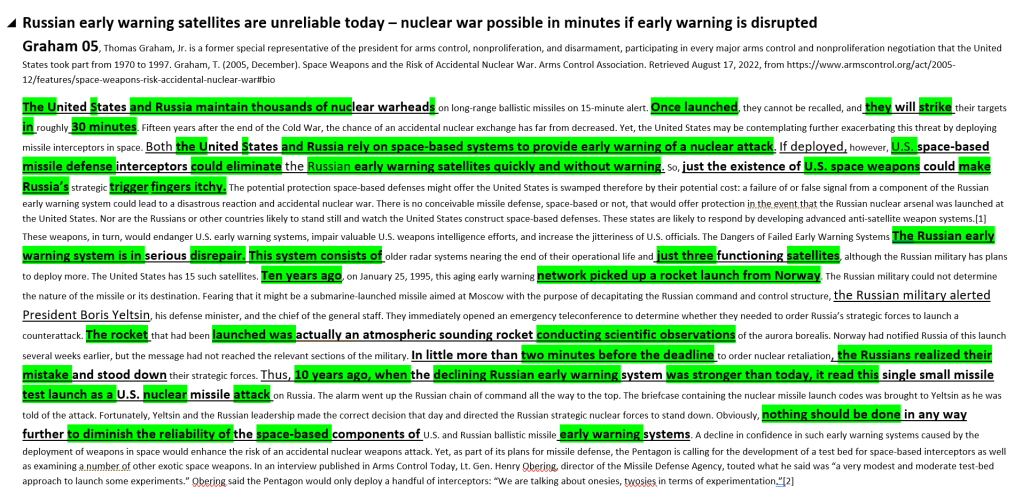
If you were to read the exact card above in a round, it would go like this:
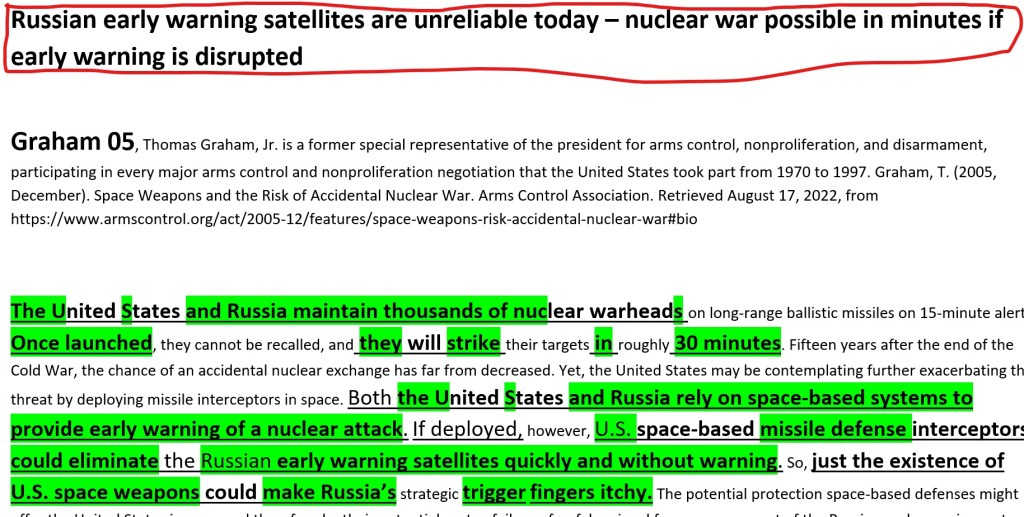
“Russian early warning satellites are unreliable today – nuclear war possible in minutes if early warning is disrupted. Graham 05. The U.S. and Russia maintain thousands of nukes. Once launched, they strike in 30 minutes. The U.S. and Russia rely on space-based systems to provide early warning of a nuclear attack…”
First, you would read the larger, bolded sentence at the beginning (called a tagline). This is the part that says “Russian early warning satellites are unreliable today – nuclear war possible in minutes if early warning is disrupted.“
Next, read the author’s last name and year (which is “Graham 05“).
Lastly, read the parts of the body of text that are highlighted (everything in green).
It is important that you read the entirety of the text you have highlighted. If you intend on reading just half of the card, make sure you indicate that you ended early by saying out loud “cut the card there” when you stop reading (make sure to update your doc afterwards by turning everything you didn’t read aloud into red-colored text, then share it). Otherwise, by forgetting to notify your judge and opponent about not reading the rest of the highlighted part, they could assume that you read more than you truly did. This is an unfair practice called “card clipping” that is frowned upon, so watch out! Also, be sure to practice, time, and edit your constructive (prepared) speeches before tournaments so that they are good to go.
You might wonder, “why cut a card when you can just type everything out and read a continuous script?” Firstly, evidence ethics is an issue – your judges and opponents want to know the source and validity of the evidence you used, so keep the original text of your source together as a card. This also applies reciprocally when you want to know about your opponent’s sources. Paraphrasing and removing the text in between paragraphs of an article leads to the possibility of misquoting or misrepresenting the author’s views – at least you might be accused of doing so. Writing cases with cards has become a community norm to the point that the vast majority of debaters and all top debaters do so. Debate gains educational value in part because peoples’ claims are held accountable – there is a risk of debaters losing due to bad evidence practices. Don’t be afraid to mention this issue in the round if it happens!
If reading through all the text of a card out loud seems overwhelming, don’t worry! You’ll become familiar with reading and analyzing cards over time. Practice helps – this means leaving a day or two before tournaments to read your case a couple of times (out loud!) and writing extensions for rebuttals.
Step-By-Step: From Article to Card
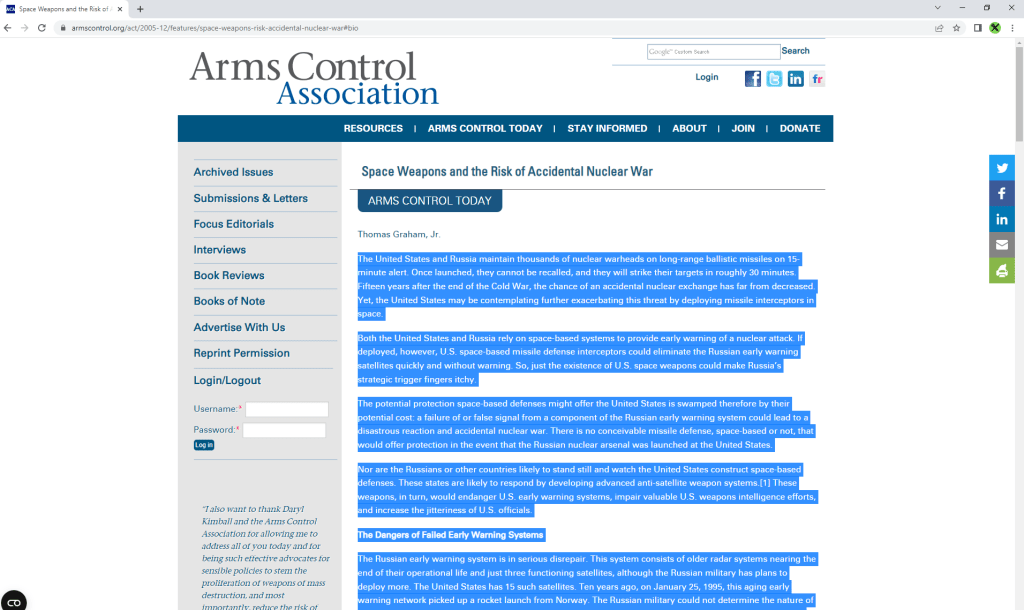
Now, let’s cut a card! After finding an article you want to cite, select the section(s) you want to use. Copy in whole paragraphs (don’t start at or cut off in the middle of sentences or paragraphs). Here, I found evidence about outer space weapons and the potential for nuclear war arising as a result.
There are a few ways to clear the formatting on your text:
- (best method) Copy the text and paste into your document with ctrl + shift + v (sometimes doesn’t work properly in Word);
- Paste the text into a Verbatim document, select it, and use Clear (F12);
- Paste the text into any document, select it, and use ctrl + space bar; or
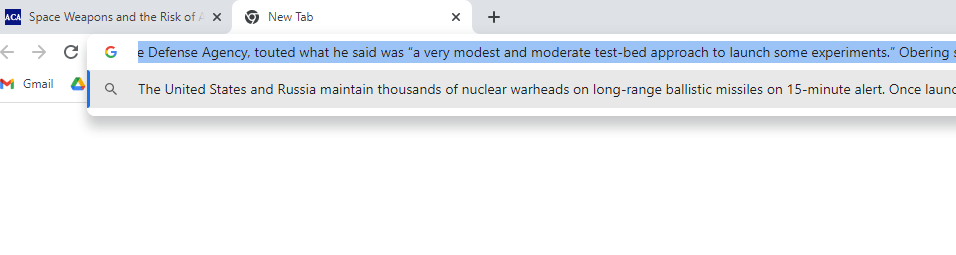
- (my go-to method) Paste the text in the search bar of a new tab (ctrl + t, in your browser of choice), but don’t search or press enter yet. Select the entirety of the text you just pasted in Google (ctrl + a), copy it, and paste into your Verbatim doc. Not only does this avoid large items (such as images or links) from carrying over into your document and slowing it down, but this also helps to quickly clear fonts or spaces between paragraphs from the article text you’re cutting from. In one swift action, it’s holding the “ctrl” key while hitting t, v, a, and x/c.


Make sure you’ve removed ads, images, or links that may have accidentally transferred over to keep your doc neat and tidy. You don’t want “BREAKING NEWS: ” or “Top 10 Toe Fungus Cures” in the middle of your card. But make sure that you don’t delete phrases that the author intended to be in the article itself (actual content about climate change or nuclear war, etc).
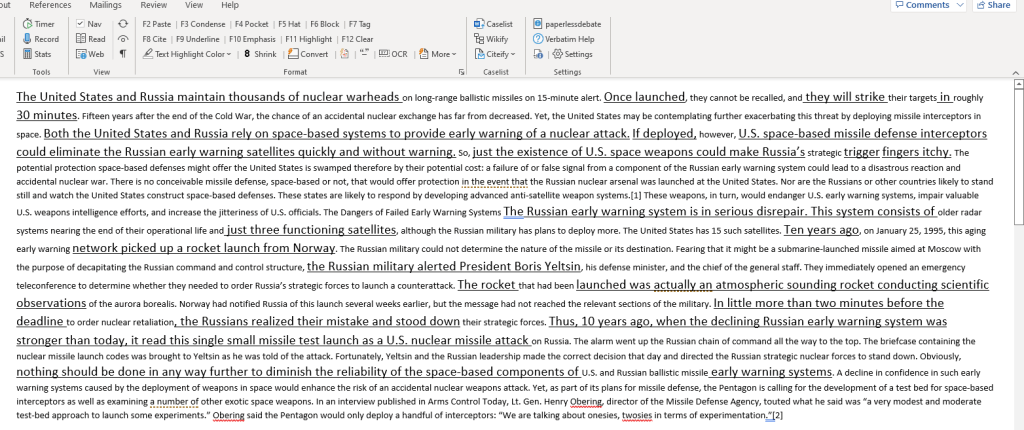
Next, you will begin reading through the text and underlining important phrases that can be read in a debate round. After going through the whole thing, “shrink” the rest that isn’t underlined (ctrl + 8). Think of this step as a “rough copy” or “first draft” of your card, just like how your school may have taught you to write essays by planning and revising.
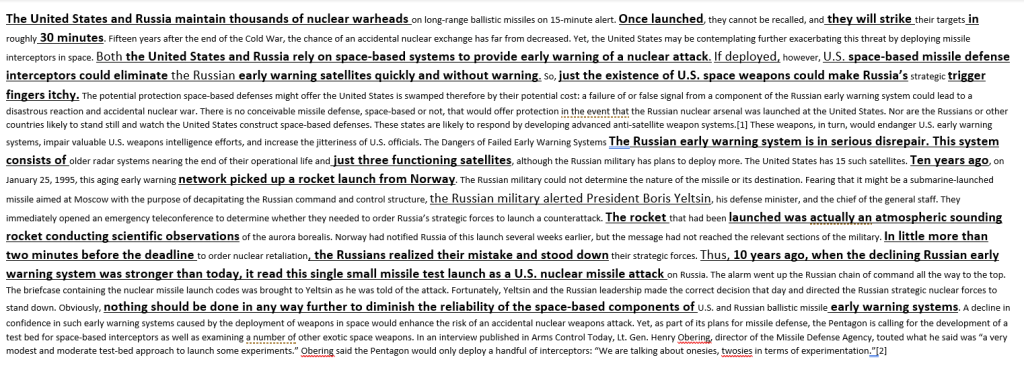
Afterwards, you will be bolding parts of the text. This is your “second draft” of a card, improving upon your original draft, but still not completely perfect.
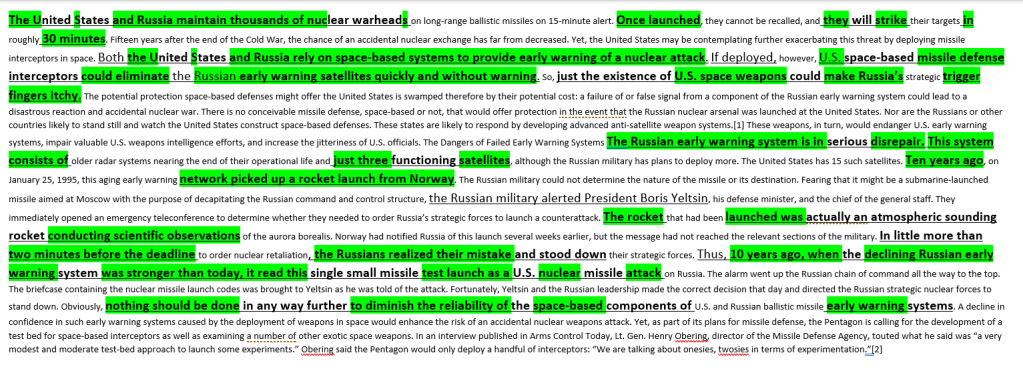
The last part of editing the body of the card is highlighting. Pick a color of your choice (ideally light colors like yellow, blue, or green so that it’s visible and easy to read) and create the final copy!
As a side note, if you wanted to read a plural/singular version of what the text says, e.g. “the US relies on…” rather than “rely” in the card, you could put square brackets “[]” around the word you added. But make sure you don’t delete the original word, in order to show what you omitted! This also applies to “is” / “are” changes and “insert long name previously explained in the card” / “it” changes.


Hold up, you’re not done yet with your card! Remember to cite:
- author
- author qualifications/achievements
- source name + link, and
- date of the information of the card that you are using!
Some debate rounds have been determined solely because someone hadn’t correctly cited everything correctly – evidence ethics are important both in debate and any academic research community in general. Follow the next few steps for citations closely…
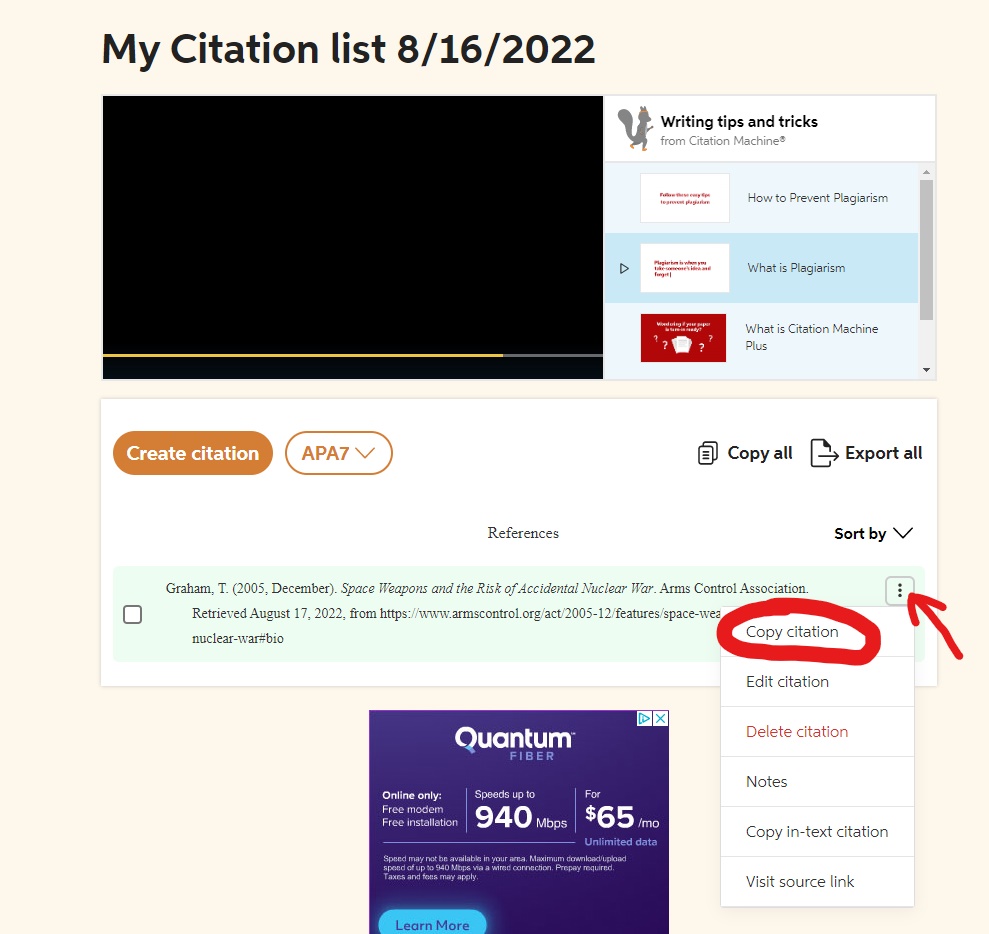
Citations are made wayyy easier with Citation Machine (https://www.citationmachine.net/), so I will be showing you how to use it! First head to their website and click on the “create citations” button.
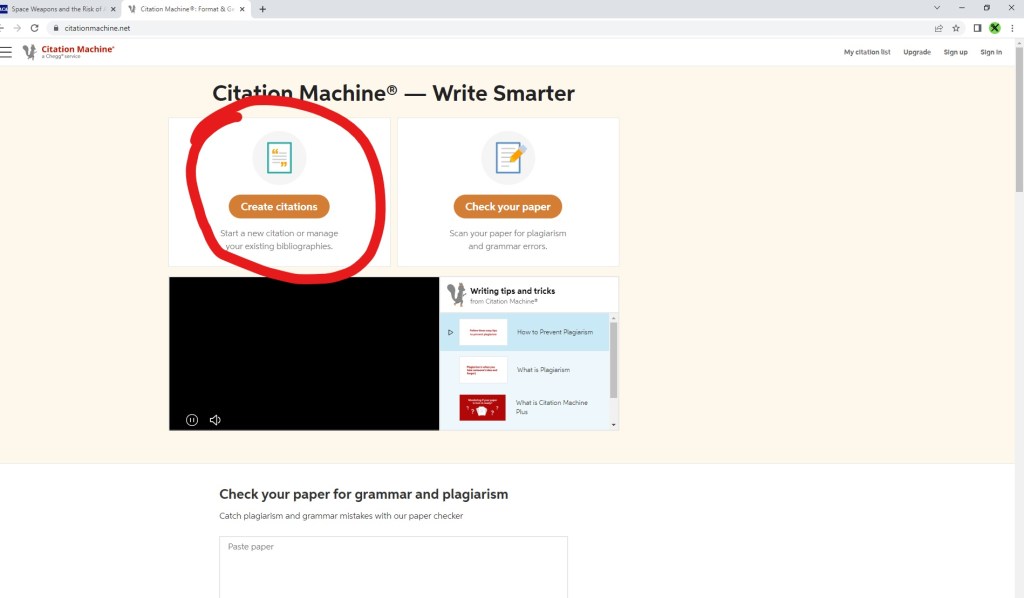
In our case, we are citing a website.
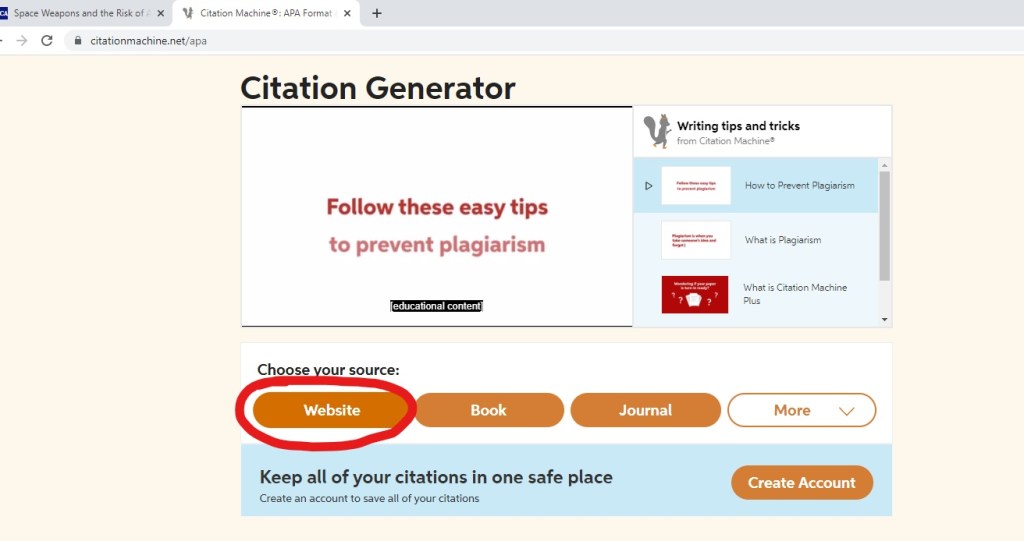
Make sure it shows that you are citing a website. Then, input the link to your website and press “search,” which will automatically find the article. Next, click “cite.”

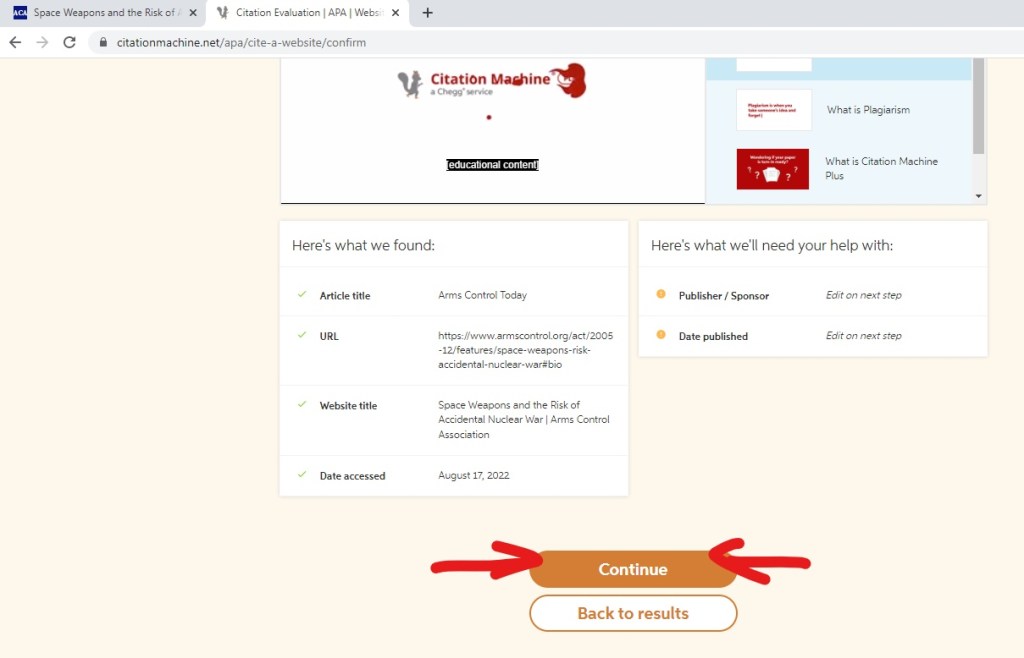
Make sure the info so far is correct, then “continue.”
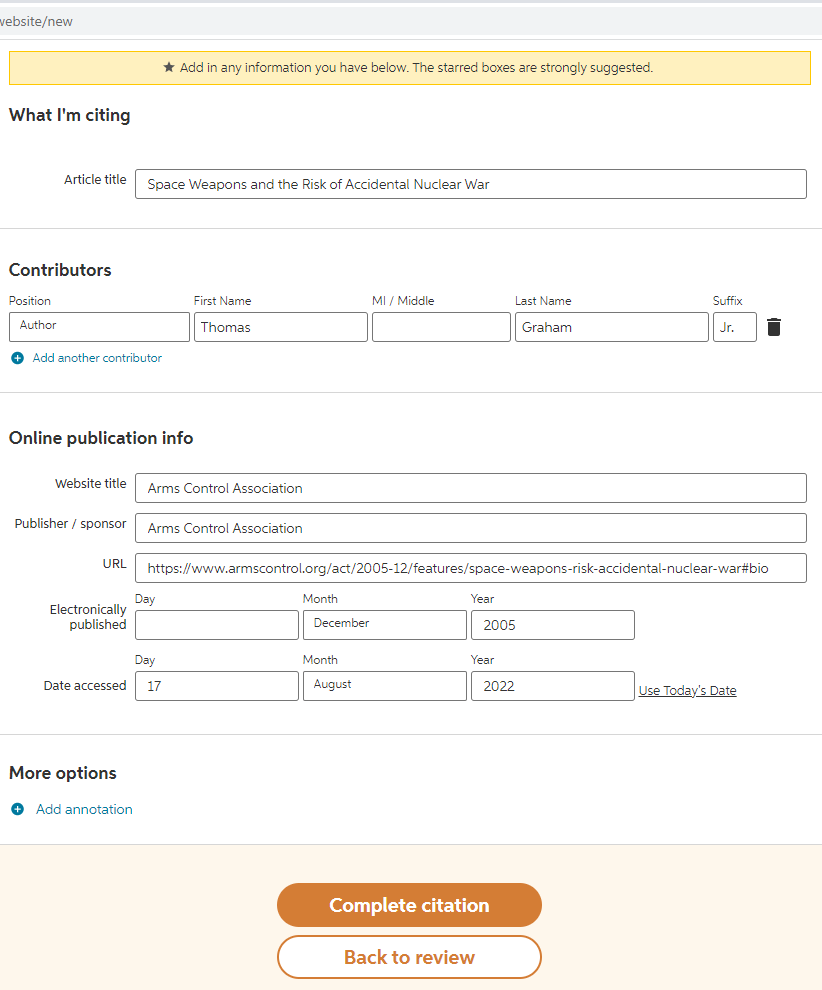
Now is the part you get typing! Fill in the info about article title, author name, etc. Then, “complete citation.”
A citation list will be created. Next to the orange “create citation” button is a drop-down menu, where you can choose what format of citation to use (APA, MLA, etc). Any is fine, as long as you have the main info down (source name, author, date, etc), there aren’t strict rules for using a specific academic citation style. Copy the citation.
If your screen shows the message below, your citation should be copied.
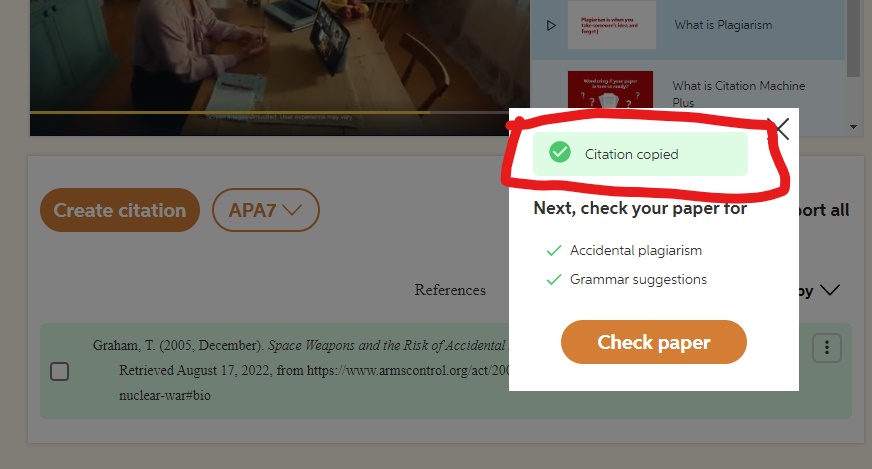
Paste it in Verbatim for now.
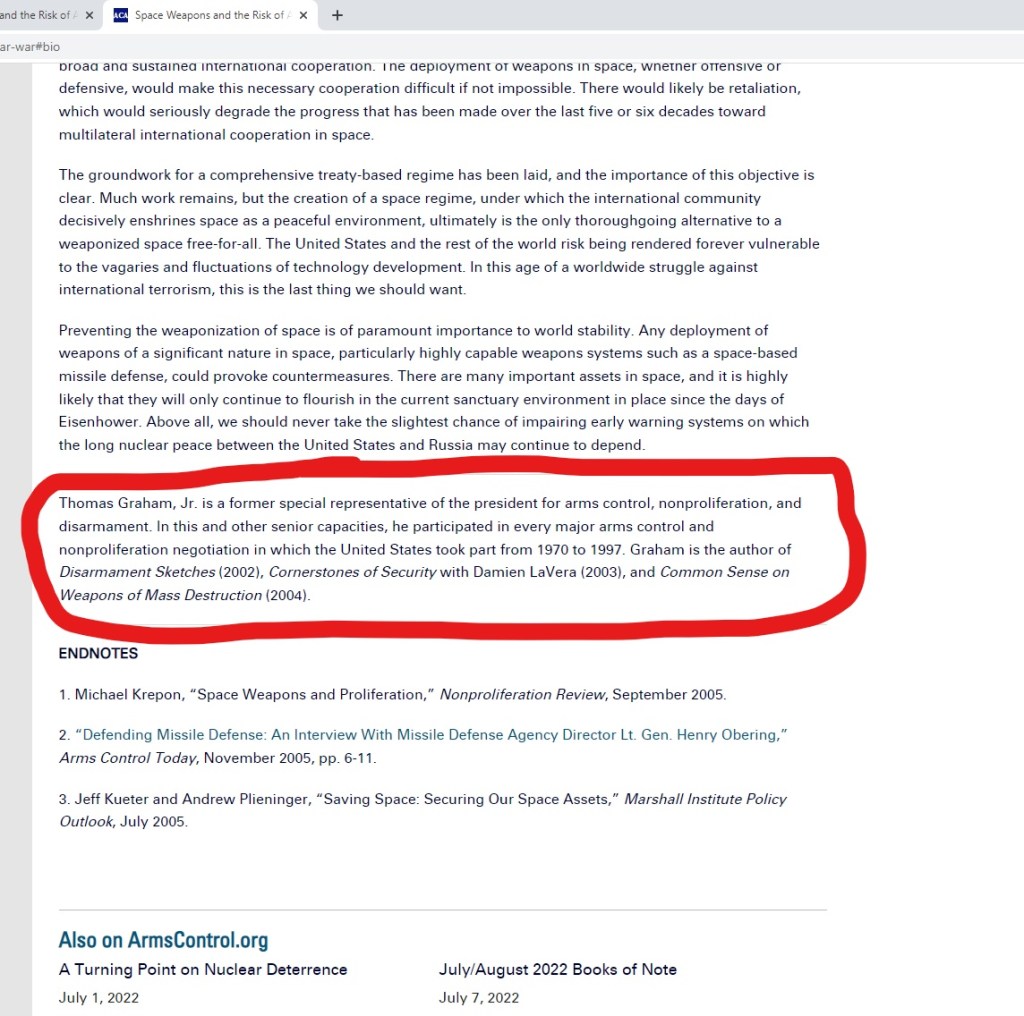
The next part is to add author qualifications. Find a description about them on the website you used. Qualifications are usually big achievements, honors/awards, education/degrees, etc – prestigious things they have done throughout their life that demonstrate why they are qualified to write about the topic. This can be found by going to the bottom of the page or opening a link attached to their name at the top.
Summarize it and paste the final piece of the puzzle along with everything else you previously had!
Mash all of the qualification info together into one blob.
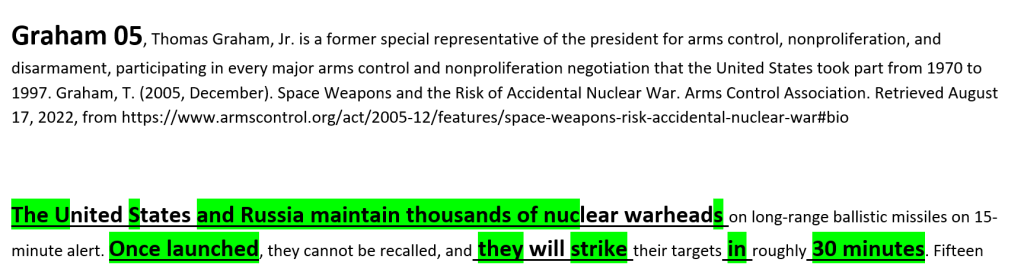
Then, add the author’s last name and the last 2 numbers of the date before everything else. Our example is “Graham 05,” which is read in-round as “Graham Oh Five” or “Graham Five.” Click “cite” in Verbatim (F8), so that it is 13-size font + bolded. Make all the rest of the qualification info size-8 font (or any smaller font than “Graham 05”).
If there are two authors, list their last names with an “&” or “and” in between, then the year. For example, “Smith and George 20.”
If there are 3 or more authors, list the first one with “et al” afterwards (e.g. “Smith et al 20”).
An article may have been published earlier in the year by the time you are reading it in a round. Therefore, using “Smith 5/19” shows that the date was May 19th when Smith’s article was published.
When no author is given in the article, write “Anonymous 20.” If there is no date, write “Smith ND” or “Smith No Date.” But it’s always best to use articles that have details about the date and author quals, as it helps boost the credibility of your evidence.
Moving on to the last part – a tagline is needed in order to summarize what your piece of evidence says (indicated in red). A good tagline is concise, usually just 1 sentence, which represents the main claim of the section of the article you used.
Remove the spaces in between and you have got yourself a card!
Researching Tips
An important aspect of backing up your claims is using appropriate sources and authors. Good sources are not always unbiased, but they are at least written by authors with the relevant education and experiences, such as professors, experts in their fields, people with PhDs or Masters, etc. The main point is that you mostly don’t want to cite blogs and forums, such as Quora or Reddit. Rather, you want to focus on academic articles and news sources, most of the time themselves backed with research. Reliable news sources include Associated Press, Vox, BBC, and Reuters. Many people use Wikipedia to get introduced to a topic, but citing Wikipedia in a round would not be ideal, especially since there are primary sources that Wikipedia itself cites (check those out and cite them instead). You may find many academic papers published and available on “Academia.edu” and SAGE Journals, among many other websites.
Another important component of evidence that could possibly go overlooked is whether you cite an article from the appropriate time or year. It is key that information you are talking about isn’t irrelevant or outdated. It’s not strategic to cite an article from the 1800’s when discussing current events – instead, opt for a source that analyzes through a modern perspective. Moving on to a less obvious example: imagine that you had cited 2015 evidence (in JanFeb of 2022) about how space mining company Planetary Resources would be able to start extracting resources from asteroids soon. Your opponent may then proceed to point out how they went out of business in 2018, thus taking out your whole argument. This exact situation happened to me in my freshman year, costing me the round, so make sure you know your research well!
While you are looking for evidence, you will 100% of the time have to extract a small paragraph from 2, 3, 4, and many times 200 pages worth of news, studies, and research. On top of that, you may only select e.g. 10 articles out of 100 that you find. Therefore, you shouldn’t be reading the entirety of the whole article each time you find one. A fast strategy to pick the helpful articles out of those that aren’t is necessary. By skimming through the “Introduction” and/or “Abstract” sections at the beginning, as well as the “Conclusion,” you will have a basic idea of what the paper says. Specifically for news sources, this would mean checking the beginning paragraph(s) and last paragraph(s). From there, you can decide whether it is useful or not, then choose if you should read the entire paper afterward.
Lastly, the overall research strategy is to start with generic searches as soon as you know your topic a few weeks ahead of the next month (seen on NSDA, which is the official organization for speech and debate in the United States https://www.speechanddebate.org/topics/). Let’s use the January-February topic of 2022, “Resolved: The appropriation of outer space by private entities is unjust.” Firstly, you would want to know the definitions of words in the resolution, Googling “appropriation definition” or “private entities meaning.” Then, you would begin preliminary research to understand the topic in general, such as looking up (but not yet citing) Wikipedia pages and YouTube explanation videos for things such as the history surrounding the issue. Lastly, the longest part of the research process is skimming through dozens of articles and reading a few in-depth, as explained in the previous paragraph. This part may take place throughout the entirety of the topic, as debaters are regularly updating their evidence in between tournaments.

Really, it’s a rewarding experience, read over the “Why Debate?” page for a bunch of reasons why it’s the best
